
Store Youth Motocross Gear Off-Season: Complete Guide
Table of Contents
- Why Proper Off-Season Storage Matters for Youth Motocross Gear
- How to Clean Motocross Gear Before Storage
- How to Store a Motocross Helmet Safely
- How to Store Motocross Boots When Not in Use
- How to Prevent Mold on Motorcycle Gear During Storage
- Organizing Multiple Sets of Youth Riding Gear
- Youth-Specific Considerations: Fit, Growth, and Hand-Me-Downs
- Spring Inspection Checklist: Getting Gear Ready to Ride
- Frequently Asked Questions
Last Updated: October 12, 2026
Why Proper Off-Season Storage Matters for Youth Motocross Gear
When you store youth motocross gear correctly during the off-season, you protect your investment and keep equipment ready for spring riding. Helmets, boots, jerseys, and protective gear deteriorate quickly without proper care.
The cost of replacing a full set of youth riding gear adds up fast. A helmet alone represents serious money. Boots, body armor, and apparel compound that expense.
Protecting gear through the off-season makes sense. A solid storage routine takes just a few hours upfront and can save you money down the road.
How to Clean Motocross Gear Before Storage
Clean gear before storage. Dirt, sweat, and mud trapped in fabric breed bacteria and odors. Cleaning also lets you spot damage before the next season starts. You'll know exactly what needs repair or replacement before you're at the track.
Cleaning Jerseys, Pants, and Riding Apparel
Start with a cold-water rinse to remove loose dirt and mud. Use your hands to gently work away caked-on debris. Do not use a pressure washer on riding apparel.
Once loose dirt is gone, hand wash in cool water with mild detergent. Focus on areas that contact sweat: armpits, collar, waistband. Let gear soak for 15 minutes if heavily soiled.
Hang everything to air dry completely before storage. Never use a dryer. Heat damages elastic and synthetics. Drying takes 24-48 hours depending on humidity.
Cleaning Goggles and Body Armor
Goggles need gentle care. Rinse lenses with cool water and wipe gently with a soft cloth. Never scrub the lens coating. For stubborn dirt, use a lens-specific cleaner or plain water with one drop of dish soap. Dry with a microfiber cloth.
Body armor shells can be wiped down with a damp cloth. If padding is removable, hand wash it separately in cool water. Air dry all armor pieces flat or hanging before storage.
How to Store a Motocross Helmet Safely
A helmet is your rider's most critical piece of protection. Improper storage compromises its integrity. Temperature swings, crushing, and moisture all damage helmets. Store helmets in a cool, dry place away from direct sunlight.
Helmet Drying and Ventilation
After riding, remove the helmet liner if possible and let it air dry separately. The interior absorbs sweat and moisture. Hang the liner or lay it flat in a well-ventilated area. Do not machine wash liners.
For the helmet shell, wipe down the exterior with a dry cloth to remove any moisture. Open the chin strap fully and position the helmet so air can circulate inside. A helmet hung upside down on a peg allows better airflow than one sitting upright.
Choosing a Storage Location for Helmets
Store helmets in a temperature-controlled space. Avoid attics, unheated garages, or sheds where temperatures swing wildly. Extreme heat warps the foam and shell. Extreme cold makes materials brittle. A climate-controlled garage, closet, or storage room works best.
Keep helmets away from direct sunlight. UV rays fade graphics and degrade the outer shell over time. Store on a shelf or hung on a padded peg. Never stack helmets on top of each other. The weight crushes the foam inside, reducing impact protection.
How to Store Motocross Boots When Not in Use
Boots take a beating during the season. Proper storage keeps them shaped and ready for next year. Boots stored poorly develop creases, cracks, and odors that are hard to reverse.
Boot Cleaning and Drying Steps
Clean boots immediately after your last ride of the season. Rinse with cool water to remove dirt and mud. Use an old toothbrush to scrub seams and crevices where debris hides.
Stuff boots with newspaper to help them hold their shape as they dry. Replace the newspaper every 12 hours to absorb moisture faster.
Once fully dry, wipe boots with a leather conditioner or protective spray if they're leather. This prevents cracking during storage. Synthetic boots benefit from a protective coating too.
Boot Organization and Accessibility
Store boots in a cool, dry location with good airflow. A garage shelf or storage closet works well. Keep boots upright or on their sides, not stacked flat. Stacking crushes the structure and creates permanent creases.
Label boots with the rider's name and shoe size. Kids grow fast. Marking boots makes it easy to spot hand-me-downs or gear that no longer fits. Store boots in pairs inside breathable mesh bags. This protects them from dust while allowing air circulation.
How to Prevent Mold on Motorcycle Gear During Storage
Mold thrives in damp, dark spaces. Once it takes hold, it's hard to remove and can ruin gear. Prevention is far easier than cleanup. The goal is keeping everything dry and moving air around.
Moisture Control and Ventilation Strategies
Use silica gel packets or moisture-absorbing containers in your storage area. These pull humidity from the air before it damages gear. Place them near helmets, boots, and any gear prone to moisture.
Ensure your storage space has airflow. A small fan running a few hours daily helps prevent moisture buildup. Open windows on dry days to exchange stale air.
Check your storage area after heavy rain or during humid months. If you notice condensation or musty smells, increase ventilation immediately.
Odor and Pest Prevention
Store gear where pests cannot reach it. Rodents and insects nest in fabric. Elevated shelves and sealed containers deter them better than floor storage.
For odor control, sprinkle baking soda inside boots and gear bags before sealing them. Baking soda absorbs odors naturally. Replace every month or two. Cedar blocks also work well.
Never store gear in plastic bags that trap moisture. Use breathable storage containers or mesh bags instead. These allow air to move while keeping dust out.
Organizing Multiple Sets of Youth Riding Gear
Families with multiple riders need a system. Without one, gear gets mixed up, lost, or damaged. A simple organization method saves time and protects your investment.
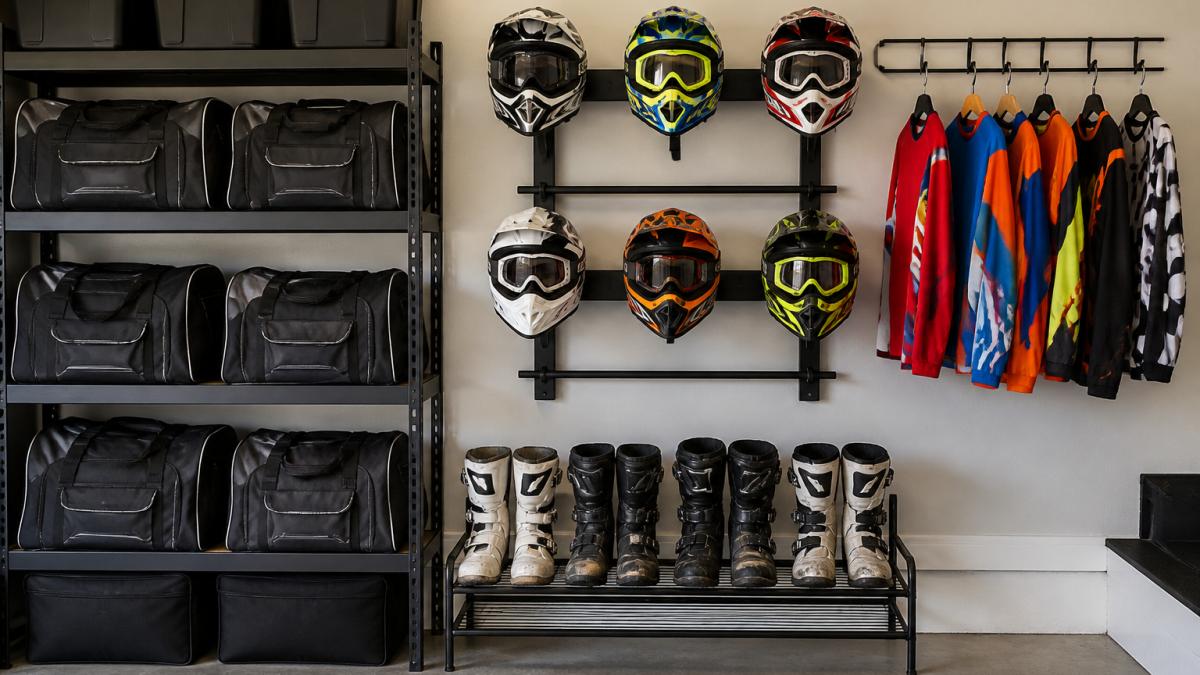
Gear Bags and Storage Containers
Invest in separate gear bags to store youth motocross gear for each rider. Label them clearly with the child's name.
Store gear bags on shelves or in a closet rather than on the floor. Elevated storage keeps gear away from spills, pests, and moisture that collects near ground level.
For helmets, a wall-mounted rack keeps them visible and protected. Helmets displayed on a rack are less likely to get crushed or forgotten. Plus, kids can see their gear and get excited about riding.
Labeling and Inventory Management
Create a simple inventory list for each rider. Note the size, brand, and condition of each item. Include the purchase date.
Use colored tape or markers to label gear by rider. Red tape for one child, blue for another. This visual system works faster than reading labels, especially when you're packing up quickly before a ride.
Take photos of your complete gear setup before storage. If something goes missing during the off-season, you have a record of what you had. Photos also help when shopping for replacement gear.
Youth-Specific Considerations: Fit, Growth, and Hand-Me-Downs
Kids grow fast. Gear that fit perfectly in spring might be too small by fall. This creates challenges for storage and planning. Managing growth and hand-me-downs requires a different approach than storing adult gear.
Checking Sizing Before Spring Season
Before the spring season starts, have each rider try on their stored gear. Kids' bodies change. A helmet that fit snugly last year might be loose or tight now.
Check boots for fit as well. Growing feet can change size significantly in just a few months. Boots that are too small restrict blood flow and cause blisters.
Try on jerseys and pants too. Gear that's too small restricts movement and looks uncomfortable. Gear that's too large bunches up and catches on controls.
Managing Hand-Me-Down Gear Between Siblings
Hand-me-downs save money and reduce waste. Gear that one child outgrows can go to a younger sibling. Before passing gear down, clean and inspect it thoroughly.
Store hand-me-downs separately from current-season gear. This prevents confusion about what's ready to use. Label hand-me-downs clearly so you know which rider it came from and when.
Keep a running list of what fits each child. As kids grow, update the list. This helps you plan ahead and know when you'll need to buy new gear.
Spring Inspection Checklist: Getting Gear Ready to Ride
Before your first ride of the season, inspect all stored gear. A quick check catches problems before they become dangerous. You'll know everything is safe and ready.
Pre-Season Gear Inspection:
- Helmets: Check for cracks, loose padding, or damage to the shell. Test the chin strap for secure attachment. Confirm the fit is snug but not tight.
- Boots: Look for cracks in leather or synthetic material. Check that soles are not separating. Ensure zippers and buckles work smoothly.
- Jerseys and Pants: Inspect seams for tears. Check that zippers function. Look for stains or odors that need addressing.
- Goggles: Clean lenses and check for scratches. Test that straps are secure and elastic hasn't degraded.
- Body Armor: Verify padding is intact and not compressed. Check that shells are not cracked. Ensure all straps and closures work.
- Gloves: Look for torn seams or worn grip areas. Test that closures are secure.
- Overall Fit: Have each rider try on their complete gear set. Confirm everything fits properly after the off-season.
If you spot damage during inspection, address it before riding. A small tear can become a big problem mid-season. Replace gear that no longer fits or provides adequate protection.
Store your inspection checklist with your gear. Use it every spring. Consistency catches problems early and keeps your riders safe.
Frequently Asked Questions
How should you store a motocross helmet during the off-season?
Store your helmet in a cool, dry location away from direct sunlight and extreme temperatures. Use a helmet bag or breathable storage container to protect it from dust. Ensure the helmet is completely dry before storing, and avoid stacking other items on top of it. A dedicated helmet shelf or wall mount in a climate-controlled garage works best. Check periodically for moisture or odors, and replace any damaged padding.
How do you keep motocross gear from getting moldy in storage?
Clean and completely dry all gear before storing. Use moisture-absorbing products like silica gel packets or cedar blocks inside storage containers. Ensure your storage area has good air circulation and stays below 60% humidity. Avoid sealed plastic bags; instead use breathable gear bags or containers with ventilation holes. Check stored items monthly, especially in humid climates, and wipe down any condensation. Store in a garage or shed rather than a damp basement when possible.
How do you clean youth motocross gear before storing it for the season?
Hand wash jerseys and riding pants in cool water with mild detergent, then air dry completely. Wipe down goggles and body armor with a damp cloth and let them dry thoroughly. For boots, remove insoles, brush off dirt, and air dry in a warm location for 24-48 hours. Clean helmet shells with a soft cloth and mild soap, and wipe the visor separately. Ensure all items are completely moisture-free before packing them away to prevent mold and odor.
How should motocross boots be stored when they are not in use?
Store boots in a cool, dry area after removing and drying the insoles separately. Use boot trees or stuff them loosely with newspaper to help maintain shape and absorb moisture. Place boots upright on a shelf or in a gear bag with good air circulation. Avoid stacking boots or storing them in sealed containers, which traps moisture. Check periodically for mold or odor, and replace newspaper if it becomes damp. Spring-check boots for cracks or wear before the new season.
Proper off-season storage protects your family's motocross gear and keeps it ready for next season. From cleaning and drying to organizing multiple sets and managing growth, a solid routine takes just a few hours upfront. Moto Dad Racing knows that families who ride together want gear that lasts and performs. Start your storage routine now, and you'll be ready to hit the track with confidence when spring arrives.