
How to Clean Muddy Dirt Bike Gear: Complete Guide
Table of Contents
- Why Cleaning Muddy Dirt Bike Gear Matters
- Step 1: Remove Heavy, Caked-On Mud Before Washing
- Step 2: Turn Garments Inside Out and Rinse Trapped Grit
- Step 3: Pre-Treat Mud and Dirt Stains on Motocross Gear
- Step 4: Machine-Wash Jerseys and Pants with Care
- Step 5: How to Dry Motocross Gear Properly
- Cleaning Protective Equipment Beyond Clothing
- Common Mistakes to Avoid When Cleaning Muddy Gear
- Frequently Asked Questions
Last Updated: October 10, 2026
Why Cleaning Muddy Dirt Bike Gear Matters
Mud damages fabric, breaks down protective coatings, and traps moisture that leads to mold and odor, which is why you need to clean muddy dirt bike gear properly after every ride. Caked-on dirt embeds into fibers, weakening material over time. Proper cleaning after each ride extends gear life and keeps your family safe and comfortable.
Clean muddy dirt bike gear immediately after riding, dried mud hardens and bonds to fabric, making removal exponentially harder. Fresh mud rinses away quickly. Sweat mixed with dirt creates stubborn stains and bacteria growth, leading to permanent discoloration and odor.
Step 1: Remove Heavy, Caked-On Mud Before Washing
Remove bulk mud before machine washing. Caked-on mud clogs filters, damages your washer, and spreads grit throughout the drum.
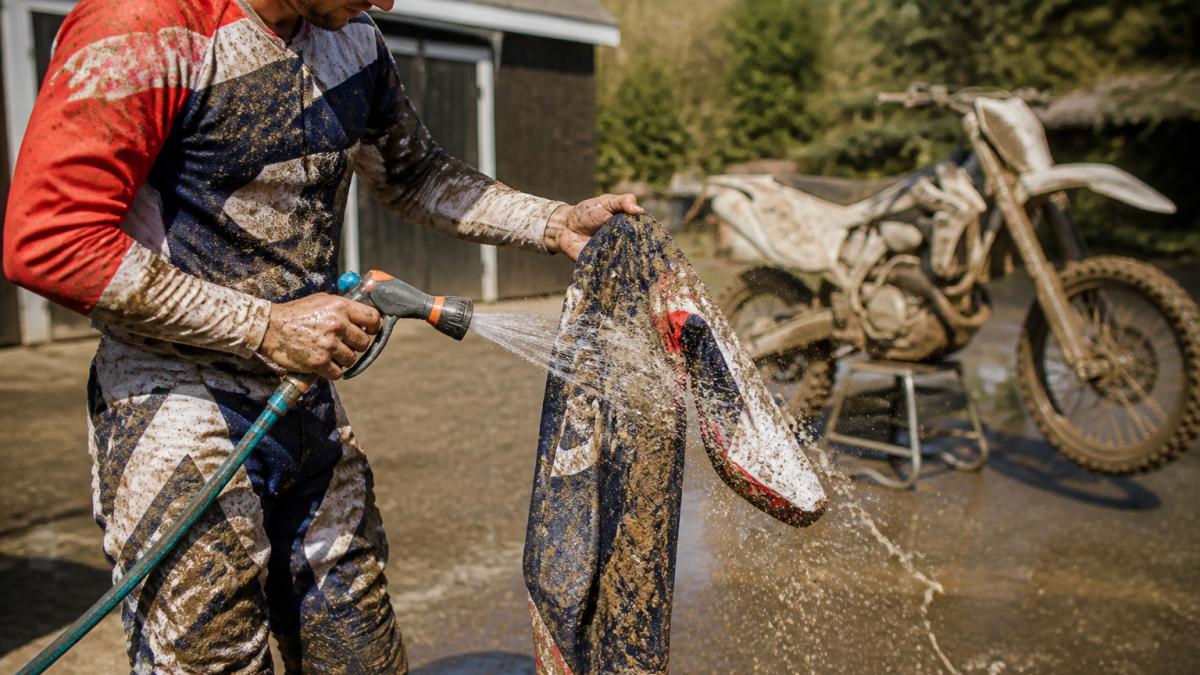
Hose Off Gear Immediately After Riding
Grab a garden hose and rinse gear outside with moderate pressure, working top to bottom. Pay special attention to seams, cuffs, and mud-heavy areas. Rinse until water runs clear (2-3 minutes per piece). Your goal is removing loose, caked-on mud before machine washing.
Use a Soft Brush for Stubborn Dirt
Use a soft-bristled brush on dried mud spots, working in circular motions on knee, elbow, seam, and cuff areas. Rinse again with the hose until visible mud is gone.
Step 2: Turn Garments Inside Out and Rinse Trapped Grit
Turn gear inside out and rinse thoroughly to flush trapped grit and sweat. Pay special attention to armpits, inside pant legs, and elastic folds where the most grit accumulates. Keep rinsing until water runs clear from both sides.
Step 3: Pre-Treat Mud and Dirt Stains on Motocross Gear
Treat stubborn stains with mild pre-treatment before machine washing. Submerge stained areas in cold water with pre-treatment product for 15-30 minutes (up to an hour for heavy stains). Gently scrub with a soft brush, then rinse thoroughly with cold water.
Step 4: Machine-Wash Jerseys and Pants with Care
Machine washing removes remaining dirt, sweat, and odor. Different materials require different approaches to prevent damage.
Prepare Gear by Material Type
Sort gear by fabric type. Turn mesh jerseys and synthetic pants inside out to protect graphics and waterproof coatings. Remove armor pieces before washing and hand-wash separately. Always use cold water, as warm water degrades waterproof treatments.
Use a Mesh Laundry Bag for Extra Protection
Place gear in a mesh laundry bag before washing to protect from aggressive agitation while allowing water and detergent to circulate. Use fine-mesh for heavily soiled gear or delicate graphics.
Choose Cold Water and a Gentle Wash Cycle
Always use cold water and a gentle or delicate cycle. Hot water damages graphics, fades colors, and degrades waterproof coatings. Load gear loosely in the mesh bag and wash separately from other clothing to prevent color bleeding.
Select Mild Detergent for Motocross Gear
Use mild detergent formulated for delicate or athletic fabrics. Measure carefully, too much leaves residue that traps odor; too little won't clean effectively. Avoid bleach, fabric softener, oxygen-based cleaners, and enzyme-based detergents, which fade graphics and degrade coatings.
Protect Your Washing Machine from Grit
After washing muddy gear, run an empty cycle with hot water and white vinegar to flush remaining grit and prevent pump damage. Do this every few washes during heavy riding season.
Step 5: How to Dry Motocross Gear Properly
Air drying is the only safe method for motocross gear. Remove gear immediately after washing and hang in a well-ventilated area away from direct sunlight. Never use a clothes dryer, machine drying cracks graphics, weakens elastic, and compresses padding. Allow 24-48 hours for complete air drying before storing.
Cleaning Protective Equipment Beyond Clothing
Protective gear requires different cleaning approaches based on material and construction. Proper cleaning maintains protective properties and prevents skin infections and odor.
Helmet Liners and Helmet Interior Padding
Hand wash removable liners in cool water with mild soap, paying attention to forehead, temple, and neck areas. Rinse thoroughly to remove soap residue and hang to air dry (12-24 hours). For non-removable padding, wipe interior with a damp cloth and mild soap, then air dry 24-48 hours before wearing.
Never machine wash helmet liners or submerge the helmet itself. Water can damage the helmet's structural foam and compromise its protective properties.
Goggles and Face Protection
Rinse goggles with cool water immediately after riding. Submerge in cool soapy water and gently swish to clean frame and straps. Rinse thoroughly until soap is gone, pat frame dry, and allow lenses to air dry (never wipe). Use a soft toothbrush on stubborn frame stains, avoiding lenses.
Gloves and Hand Protection
Motocross gloves take significant abuse and collect mud, sweat, and grit in every seam and crevice. Dirty gloves cause skin irritation and reduce grip during rides.
Rinse gloves with a hose immediately after riding to remove loose mud. Fill a bucket with cool water and add mild soap. Submerge gloves and scrub with a soft brush, working soap into all seams, between fingers, and around the wrist cuff where sweat accumulates. Pay special attention to the palm and finger areas where grip material sits.
Rinse thoroughly until water runs clear. Squeeze out excess water gently; do not wring gloves, as this can damage protective reinforcements and stitching. If your gloves have removable wrist cuffs or protective inserts, remove these before washing and hand wash them separately.
Stuff gloves loosely with newspaper or a clean cloth to help them retain their shape while drying. Replace the newspaper as it absorbs moisture. Hang gloves in a well-ventilated area to air dry completely. This usually takes 24-48 hours.
Boots and Foot Protection
Boots collect the most mud and absorb sweat from your feet. Dirty boots cause blisters, fungal infections, and odor that persists even after washing if not cleaned properly.
Rinse boots with a hose immediately after riding, paying special attention to the soles where mud hides and the seams where dirt accumulates. Use a soft brush to gently scrub the outer surfaces. Fill a bucket with cool water and add mild soap.
Rinse thoroughly with cool water until water runs clear from both the outside and inside of the boot. Squeeze out excess water gently. If your boots have removable insoles, remove them and wash separately. Stuff boots loosely with newspaper to help them hold their shape while drying. Replace newspaper every 6-8 hours as it absorbs moisture.
Stand boots upright in a well-ventilated area, preferably outdoors or in a garage. Allow 48-72 hours for complete air drying before wearing again. Never machine wash boots or use a dryer. The agitation damages stitching and protective reinforcements that are essential for ankle support and impact protection.
Chest Protectors, Knee Guards, and Shoulder Armor
Protective armor pieces absorb sweat and impact energy. Proper cleaning maintains their protective properties and prevents odor.
Remove armor pieces from your gear before washing. Rinse with a hose to remove loose mud. For armor with removable foam padding, remove the padding and wash separately. Hand wash the outer shell in cool soapy water with a soft brush.
Wash removable foam padding by hand in cool soapy water. Gently squeeze soapy water through the foam; do not scrub or wring, as this damages the foam structure and reduces impact protection. Rinse thoroughly until water runs clear. Squeeze out excess water gently and hang to air dry completely.
For armor with non-removable padding, wipe the outer shell with a damp cloth and mild soap. Use a soft brush for stubborn sweat stains. Rinse with a damp cloth and allow to air dry completely before reinstalling in your gear.
Never machine wash armor or submerge it for extended periods. Water can damage foam padding and compromise protective properties. Always ensure armor is completely dry before wearing it again.
Common Mistakes to Avoid When Cleaning Muddy Gear
Most riders make the same cleaning mistakes that damage gear prematurely. Understanding these errors helps you protect your investment.
Using hot water or a standard wash cycle. Hot water fades graphics and weakens elastic.
Skipping the rinse step before washing. Putting caked-on mud directly in your machine clogs filters and spreads grit. Always rinse with a hose first.
Leaving gear wet after washing. Wet gear left in the washer develops mold and permanent odor within hours.
Using a clothes dryer. Machine drying ruins graphics, elastic, and protective padding. Air drying is the only safe method.
Washing with harsh detergents or bleach. These products fade colors, damage graphics, and weaken protective coatings. Mild detergent is all you need.
Storing damp gear. Mold and mildew develop quickly in damp gear, creating permanent odors and stains. Always ensure gear is completely dry before storing.
Scrubbing with stiff brushes. Wire brushes and stiff scrubbers damage fabric, tear graphics, and remove protective coatings. Use only soft-bristled brushes.
Keeping your family's motocross gear clean protects both the equipment and the riders wearing it.
Frequently Asked Questions
Should I rinse mud off dirt bike gear before washing it?
Yes, absolutely. Rinse off heavy, caked-on mud with a garden hose or bucket of cold water immediately after riding, before the mud dries. This prevents mud from clogging your washing machine and makes the actual wash cycle much more effective. Use a soft brush to gently remove stubborn dirt, then proceed to machine washing. Waiting until mud dries makes removal much harder and can damage fabric fibers.
What's the best detergent for motocross gear?
Use a mild detergent specifically formulated for athletic or technical fabrics. Avoid harsh chemical cleaners, bleach, and heavy-duty detergents that can fade graphics, degrade elastic materials, and irritate skin. Mild dish soap or specialized gear cleaner works well for hand-washing stubborn stains. Always check your gear's care label first, as some materials have specific requirements. Cold water combined with mild soap protects colors and extends the life of your motocross apparel.
Can you put motocross gear in the washing machine?
Yes, most motocross jerseys and pants can go in the washing machine if you follow proper steps. After removing caked-on mud and pre-treating stains, turn garments inside out, use cold water, select a gentle wash cycle, and add mild detergent. Avoid fabric softener and bleach. Check the care tag on your specific gear, as some protective padding or graphics may require hand-washing instead. Machine washing on gentle settings is safe and effective for most riding gear.
How should I dry dirt bike gear after washing it?
Air-dry your motocross gear completely. Hang jerseys, pants, and other items in a well-ventilated area away from direct sunlight, which can fade graphics and colors. Never use a dryer, as high heat damages elastic materials, shrinks fabric, and can melt protective padding. Lay flat or hang on a clothesline until fully dry. This process takes 24-48 hours depending on humidity and airflow. Proper air-drying preserves the integrity of your gear and prevents odor and mildew growth.