
How to Choose Motocross Apparel: A 2026 Guide
Table of Contents
- Motocross Gear Checklist for Beginners
- How to Choose Dirt Bike Gear Size
- Safety Certifications and Abrasion Resistance in Motocross Apparel
- Ventilation, Breathability, and Thermal Regulation
- Matching Gear to Your Riding Style and Posture
- Motocross Apparel Maintenance Tips
- Post-Crash Inspection and Gear Compatibility
- Conclusion
- Frequently Asked Questions
Last Updated: September 18, 2026
Motocross Gear Checklist for Beginners
Getting gear right the first time saves money and protects you and your kids. This guide covers how to choose motocross apparel that fits, breathes, and holds up to track abuse.
Motocross apparel is the protective, comfort-focused clothing riders wear on a dirt bike: helmets, jerseys, pants, gloves, boots, and goggles. A beginner setup covers every category before a rider touches the throttle.
Here's the short version of what you actually need:
- Helmet with a current safety certification and a proper chin-bar clearance check
- Goggles that seal against the helmet opening without pinching
- Jersey in a moisture-wicking fabric that allows full arm movement
- Pants with reinforced stitching and heat-resistant inner-knee panels
- Gloves with a snug wrist closure and grip material on the palm
- Boots with ankle support and a shin plate
- Chest and back protection sized for the rider's torso length
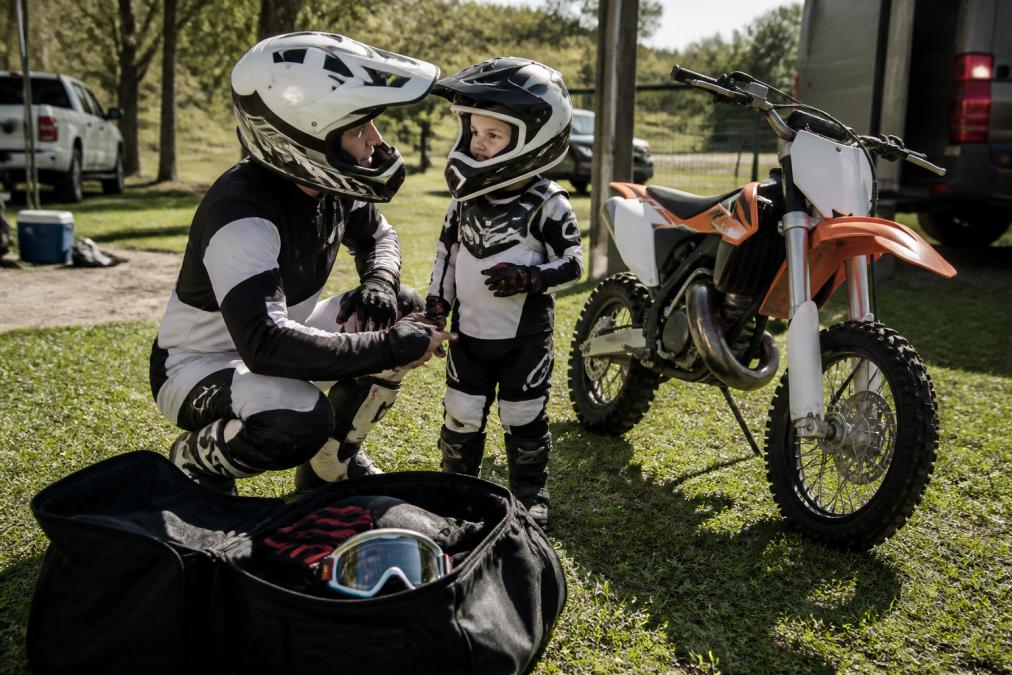
Most beginners overspend on the helmet and underspend on the pants. That's backwards. Pants take the most abrasion in a slide, and cheap stitching fails first. Buy protective layering in the order of what touches the ground most.
As the Motorcycle Safety Foundation rider resources note, protective equipment only works when it fits and stays in place during a fall.
How to Choose Dirt Bike Gear Size
Sizing is the biggest factor in whether gear actually protects you.
| Item | Measure | Fit Rule | Common Mistake |
|---|---|---|---|
| Jersey | Chest and arm length | Snug at shoulders, loose through torso | Sizing down for a "race look" |
| Pants | Waist and inseam | Snug waist, room at knee for padding | Ignoring knee-pad clearance |
| Gloves | Palm circumference | No bunching at fingertips | Buying gloves that stretch out |
| Boots | Foot length in socks | Toe touches front, heel locked | Sizing up for growth |
| Helmet | Head circumference | Firm cheek pressure, no wobble | Buying loose for comfort |
Safety Certifications and Abrasion Resistance in Motocross Apparel
-
DOT (FMVSS 218): The federal minimum, enforced by the National Highway Traffic Safety Administration. Every helmet sold for on-road use must meet it. It is a pass/fail drop test, not a ranking.
-
Snell M2020D / M2020R: A voluntary standard from the Snell Memorial Foundation. The 'D' variant is tested for the heavier, more abrasive impacts typical of dirt riding; the 'R' variant targets road impacts. Snell testing is more demanding than DOT and is widely treated as the stricter benchmark.
-
ECE 22.06: The current European standard, commonly found on imported helmets. It adds rotational-impact and low-energy linear tests that DOT does not require. It is not a US legal substitute for DOT on public roads, but many track and off-road riders seek it out for the broader test envelope.
-
Full-grain leather at high-wear zones like the inner knee and seat. Leather resists abrasion far better than any woven synthetic at the same weight.
-
Synthetic materials with a stated denier or tensile strength for the main panels. A higher denier number means a heavier, more abrasion-resistant yarn.
-
Reinforced stitching at every seam that takes load, especially the crotch and knee. Look for double- or triple-stitched seams, not single.
-
Protective padding that stays put when you move, not foam that shifts. Removable, pocketed padding is easier to inspect and replace.
Chest and back protectors sold in the US have no helmet-style federal standard. Some carry a CE Level 1 or Level 2 rating from the European EN 1621 family, which measures force transmission through the armor. Level 2 transmits less force than Level 1 but is thicker and hotter; Level 1 suits most riders, while high-speed track use justifies Level 2's heat penalty.
Ventilation, Breathability, and Thermal Regulation
Motocross is a high-exertion sport, and heat buildup inside gear causes fatigue faster than almost anything else. Breathable mesh and moisture-wicking fabric do more for your riding than a heavier, hotter layer.
Thermal regulation is about matching gear weight to conditions:
- Hot, dry conditions: maximum mesh, lightest jersey weight, minimal layering
- Warm and humid: moisture-wicking base layer plus vented outer jersey
- Cool mornings: add a mid-layer under the jersey, keep the outer shell vented
- Cold or wet: wind-resistant outer layer, but keep at least one vent open
Matching Gear to Your Riding Style and Posture
Your riding posture should decide your gear. A trail rider who sits needs different pant articulation than a track rider who stands through every whoop section.
Match your gear this way:
- Track riding: race-fit pants with maximum knee articulation, lightweight vented jersey
- Trail riding: more durable pant with reinforced seat, slightly looser jersey for layering
- Family pit riding: comfort-focused gear, less race-fit, more emphasis on breathability
Motocross Apparel Maintenance Tips
Wash motocross gear after every ride and never use a hot dryer. Dirt left in fabric acts like sandpaper on stitching, and heat breaks down padding foam.
A simple maintenance routine:
- Rinse mud off with cold water before it dries
- Wash separately from regular laundry to avoid transferring grit
- Use a mild detergent, no fabric softener, which clogs moisture-wicking fabric
- Air dry in shade; direct sun degrades synthetic materials over time
- Inspect seams and padding after each wash
Post-Crash Inspection and Gear Compatibility
Replace any helmet that takes a direct impact, even if it looks fine. Shells are designed to crush once, and the damage is often invisible. The rest of your kit needs a real inspection protocol, not a glance.
- Helmet: Any hard contact with the ground means retire it. Do not inspect and reuse. The EPS liner crushes on impact and does not spring back; a helmet that has absorbed one hit has already spent its protection. Cut the chin straps before discarding so no one pulls it out of the trash and rides in it.
- Boots: Check the sole bond and buckle hardware for cracks. Flex the sole by hand, if the shank feels soft or you can feel the sole separating at the toe, the boot has lost its structure. Replace buckles rather than the whole boot if only the hardware failed.
- Pants and jersey: Look for torn seams, exposed padding, and stretched waistbands. Run a thumb along every seam that took load. A seam that has pulled but not yet opened is a failure in progress, repair it before the next ride.
- Chest and back protection: Check that padding hasn't cracked or compressed. Squeeze the armor; if it feels permanently flattened or the outer shell is cracked, the foam has lost its ability to spread impact force.
- Gloves and goggles: Check strap elasticity and lens scratches. A stretched goggle strap lets the goggle shift on impact, which is exactly when you need the seal to hold. Scratched lenses are a visibility problem, not just a cosmetic one.
- Stitching pull-through: Look at the underside of seams, not just the top. A stitch that has pulled through the fabric leaves a small hole on the back side even when the front looks intact.
- Foam compression set: Padding that has been compressed and held (in a gear bag, under a boot, in a hot car) can take a permanent set. If it does not spring back when you release it, it will not absorb impact the way it was designed to.
- Hardware fatigue: Plastic buckles and D-rings develop hairline cracks after repeated impacts. Flex them gently and look for whitening at the stress points, that is the plastic telling you it is about to fail.
Conclusion
Getting motocross apparel right comes down to fit, materials, and honest inspection, not brand names or price tags. Buy gear that fits today, check certification labels, and replace anything that's taken a hit.
Frequently Asked Questions
What size jersey should I wear for motocross?
Motocross jerseys fit differently than street clothes. Measure your chest at its widest point and your arm length from shoulder to wrist. Most brands run true to size, but if you plan to wear a chest protector underneath, size up. For kids, check the brand's youth chart because a 7-year-old may need a youth medium in one brand and a youth large in another. Always try on with your protective gear.
What MX gear is best for beginners?
Start with a helmet, goggles, gloves, a jersey, pants, and boots. For the jersey and pants, look for abrasion-resistant materials like full-grain leather in high-wear zones and reinforced stitching at the knees. Breathable mesh panels help with heat, and moisture-wicking fabric keeps you dry. You do not need the most expensive set, but do not skip impact protection or safety certification.
How often should I replace my motocross protective gear?
Replace your helmet after any hard crash or every three to five years, even without a crash, because the foam liner degrades. Pants and jerseys should be replaced when stitching pulls apart, abrasion panels wear thin, or the fabric loses its shape. Gloves and goggles wear out faster, so check for stretched seams or scratched lenses every few months. Post-crash inspection is key.
What is the difference between professional racing gear and casual motocross apparel?
Professional racing gear is built for impact absorption, tensile strength, and heat resistance, with articulated design for riding posture. Casual motocross apparel, like hoodies and tees, focuses on comfort, moisture management, and everyday style. Both can show your passion for the sport. For riding, always choose certified protective gear. For the pits or family events, casual motocross apparel works great.