
Break in Motocross Boots for Comfort: A Step-by-Step Guide
Table of Contents
- Why New Motocross Boots Feel Stiff
- How Long to Break in MX Boots
- Best Way to Soften Stiff Motocross Boots
- Break in Motocross Boots for Shifting and Brake Control
- How to Adjust Gear Shifter for MX Boots
- Hinged vs. Non-Hinged Boots: What Actually Matters
- Maintenance and Care After Break-In
- Common Mistakes to Avoid When Breaking In New Boots
- Frequently Asked Questions
Last Updated: September 28, 2026
Why New Motocross Boots Feel Stiff
When you break in motocross boots, you'll find they arrive rigid and unforgiving because they're engineered for protection, not comfort. The materials are deliberately stiff to provide crush protection and roll protection during aggressive riding. Leather hasn't been worked in yet. The interior padding is firm. Buckles and straps feel tight. Your ankle has no flex room.
This stiffness isn't a defect, it's intentional. A boot that's too soft early on won't hold your foot securely during shifting and brake control. The rigidity keeps your ankle stable when you're working the foot pegs and leaning hard into turns.
But here's what most riders miss: this initial stiffness is temporary. The boot will mold to your foot. Leather conditioning and proper break-in techniques speed up that process without compromising safety.
How Long to Break in MX Boots
Breaking in motocross boots typically takes 20 to 40 hours of actual riding time. Some riders report noticeable improvement after 10 hours. Full comfort usually arrives around the 30-hour mark.
The timeline depends on several factors:
- Boot construction: Hinged boots break in faster than rigid non-hinged designs
- Leather quality: Premium leather softens more predictably than synthetic materials
- Your riding intensity: Aggressive riding accelerates the molding process
- Break-in methods: Using conditioning techniques cuts weeks off the timeline
- Fit: Boots that fit correctly break in faster than oversized or undersized pairs
Don't rush this process by wearing boots only during casual activities. Motocross boots need actual riding pressure to mold properly. The foot movements during shifting, braking, and cornering create the pressure points that shape the leather and padding.
Best Way to Soften Stiff Motocross Boots
Softening stiff motocross boots requires patience and the right techniques. Rushing the process or using destructive methods can damage the structural integrity that keeps you safe.
Manual Flexing Techniques
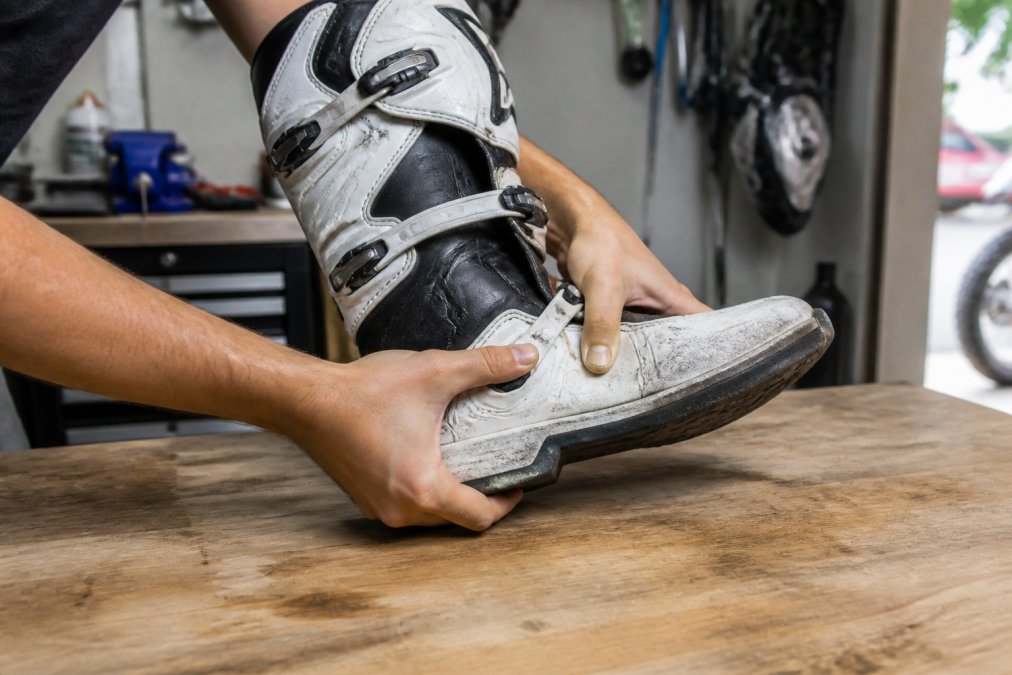
Manual flexing is the safest way to speed up the break-in period for your motocross boots. This method mimics the natural flexing that happens during riding without putting your feet at risk.
Start by holding the boot firmly at the heel and toe. Bend the boot at the ankle flex zone, the area where your ankle naturally flexes. Apply steady pressure, not sudden force. Flex the boot backward and forward 10-15 times. Rotate the boot and flex it side to side. Repeat this process daily for 5-10 minutes.
Focus on the areas causing discomfort. If the toe box feels restrictive, grip the boot at the toe and gently flex upward. If ankle flex is limited, work the ankle zone more aggressively. The goal is to gradually increase flexibility without tearing stitching or damaging the sole.
Many riders make the mistake of over-flexing in one session. Spreading the work across multiple days is more effective. The leather responds better to consistent, moderate pressure than occasional aggressive flexing.
Wearing Boots Around the House
One of the simplest break-in methods is wearing your boots during everyday activities. Walk around your house, climb stairs, sit and stand repeatedly. This creates natural flexing and allows the interior padding to compress gradually.
Wear them while watching television or working at a desk. The low-impact environment lets you identify pressure points without the intensity of riding. You can adjust laces and straps as needed. This method works best for the first 5-10 hours of break-in.
The downside is that house wear doesn't replicate the foot movements of actual riding. Use it as a supplement to riding time, not a replacement.
Leather Conditioning Methods
Leather conditioning accelerates the softening process by increasing the material's flexibility. Proper conditioning also protects the leather from cracking and premature wear.
Apply a quality leather conditioner designed for motorcycle gear. Rub it into the boot using circular motions, focusing on areas that feel stiff. Allow the conditioner to soak for 15-20 minutes. Wipe away excess product with a clean cloth. Repeat this process every 3-5 days during the break-in period.
Some riders use heat to enhance conditioning. A heat gun on low setting, held 6-8 inches from the boot, can help conditioner penetrate deeper. Move the heat gun continuously, never hold it in one spot. The goal is warmth, not scorching. After heating, flex the boot while it's still warm. The combination of heat and flexing accelerates molding.
Avoid soaking boots in water as a softening method. This can damage the sole, weaken stitching, and cause the leather to shrink unevenly. Water-based softening is unpredictable and often creates new problems.
Break in Motocross Boots for Shifting and Brake Control
The relationship between boot stiffness and shifting performance is direct. A boot that doesn't flex properly restricts your foot movement on the foot pegs. This limits your ability to shift smoothly and control the brake lever precisely.
During break-in, focus on movements specific to riding. Practice shifting motions without the bike running. Place your foot on a sturdy surface and practice the upshift motion, rolling your toe upward against the shifter. Practice the downshift motion, pushing your heel down. These movements teach your boot to flex where it needs to.
Once you're riding, the shifting and braking demands will accelerate the break-in process. The repetitive foot movements create pressure exactly where the boot needs to soften. Pay attention to how your foot feels during shifts. If the boot resists the motion, you're identifying areas that still need work.
Boots that don't break in properly for shifting can cause missed shifts and inconsistent braking. This is a safety issue, not just a comfort problem. A boot that restricts your foot control compromises your ability to manage the bike during technical sections.
How to Adjust Gear Shifter for MX Boots
Sometimes the problem isn't the boot, it's the shifter height or angle. A shifter positioned too high or too low can make even a broken-in boot feel restrictive during shifting.
Shifter adjustment is a straightforward process. Most shifters have a bolt at the base that allows you to rotate the shifter up or down. Loosen this bolt slightly. Adjust the shifter so the lever sits at a comfortable height relative to your foot. Tighten the bolt securely.
The ideal position allows your foot to contact the shifter with a natural motion. Your toe shouldn't have to stretch upward for upshifts, and your heel shouldn't have to reach down excessively for downshifts. If you're new to motocross, start with the shifter at a neutral position and adjust after a few rides based on how it feels.
Some riders bend the shifter lever itself to change the contact point. This is a temporary solution. A professional adjustment of the shifter assembly is more reliable and safer.
Hinged vs. Non-Hinged Boots: What Actually Matters
The hinge myth persists in motocross communities, but the reality is more nuanced. Hinged boots have a flexible section at the ankle that allows more immediate ankle flex. Non-hinged boots rely on the leather itself to flex gradually during break-in.
Hinged boots break in faster because the hinge provides instant flexibility. If you're looking for comfort in the first 10 hours of riding, a hinged design delivers it. The downside is that hinges can fail or wear out, and some riders feel less ankle support with a hinged design.
Non-hinged boots offer superior ankle protection and rigidity. They feel stiff initially, but once broken in, they provide solid support without moving parts that can fail.
Maintenance and Care After Break-In
Once your boots are broken in, maintenance determines how long they stay comfortable. Neglected boots deteriorate quickly. Properly maintained boots last for years.
Common Mistakes to Avoid When Breaking In New Boots
The biggest mistake is expecting immediate comfort. New boots aren't designed for comfort, they're designed for protection. Patience during break-in is essential.
Frequently Asked Questions
How long does it take to break in motocross boots?
The break-in period typically ranges from 5 to 15 hours of actual riding time, though this varies based on boot construction and material. Stiff leather boots generally take longer than synthetic options. You'll notice the most dramatic improvements in the first few rides as ankle flex zones begin to mold to your foot shape. Full break-in, where the boots feel completely natural and protective padding settles, usually occurs within 2 to 3 weeks of regular riding. Patience matters more than speed; rushing the process can lead to discomfort and blisters.
What's the fastest way to soften stiff motocross boots?
Manual flexing combined with wearing the boots around your house delivers the quickest results. Bend the ankle and toe box repeatedly by hand for 5 to 10 minutes daily, then wear the boots indoors while walking to accelerate molding. For leather boots, applying a quality leather conditioner helps soften the material without damaging it. Avoid heat guns or soaking methods, these can warp the boot structure and compromise crush and roll protection. The fastest safe approach is consistent, gradual wear rather than aggressive techniques.
How should I adjust my gear shifter once my boots are broken in?
Once your motocross boots reach full break-in and ankle flex improves, you can fine-tune shifter contact. Start by riding in a safe area and noting where your foot naturally lands on the shifter. If the shifter feels too high or low relative to your ankle position, you may need to adjust the shifter lever itself, some boots settle lower on your foot after break-in. Minor shifter adjustments should only happen after boots are fully molded; premature adjustments based on stiff boots can lead to poor shifting technique once the boots soften.
Can I use heat or soaking to speed up breaking in my boots?
Heat guns and soaking methods carry significant risks and are not recommended. Excessive heat can warp the rigid structure that provides crush protection and roll protection, compromising safety. Soaking leather can cause permanent damage, color bleeding, and mold growth. Instead, focus on natural softening through manual flexing, leather conditioning products designed for motocross gear, and regular wearing. These methods take slightly longer but preserve the protective integrity of your boots while achieving genuine, lasting comfort.